
 Back to homepage

 Sales & Marketing
 Reactive Forms Angular: Comprehensive Guide
Reactive Forms are a powerful way to build forms in Angular. It gives developers the flexibility to create dynamic and complex forms with minimal effort. This guide will walk you through the process of mastering Reactive Forms in Angular. We’ll cover the basics of creating reactive forms, validating them, submitting them, and working with FormArrays and FormBuilder.


Table of content
Table of Contents
We’re on board to help with your product. Don’t hesitate to get in touch.
Contact Us Let’sTalk
Reactive Forms are a powerful way to build forms in Angular. It gives developers the flexibility to create dynamic and complex forms with minimal effort. This guide will walk you through the process of mastering Reactive Forms in Angular. We’ll cover the basics of creating reactive forms, validating them, submitting them, and working with FormArrays and FormBuilder.
What are Reactive Forms?
Reactive Forms are a powerful way to build forms in Angular. It is an approach to create forms that are driven by a data model. It uses a reactive programming model to handle form inputs, which makes them more flexible than template-driven forms. Reactive forms also allow developers to have more control over the form and its elements.
Reactive Forms are created using FormControls, FormGroups, and FormArrays. FormControls are used to represent individual controls such as text input fields, checkboxes, radio buttons, etc. FormGroups are used to group related FormControls together, and FormArrays are used to represent collections of FormControls.
One of the advantages of using Reactive Forms is that they are more maintainable and easier to debug. They also allow developers to add custom validations, which makes them more versatile.
Advantages of Reactive Forms
Reactive Forms provide a number of advantages over template-driven forms, including:
- More maintainable: Reactive Forms are more maintainable than template-driven forms, as they are driven by a data model and not HTML. This makes them easier to debug, and allows developers to have more control over the form and its elements.
- More versatile: Reactive Forms allow developers to add custom validations, which makes them more versatile than template-driven forms.
- Better performance: Reactive Forms are faster than template-driven forms, as they are not reliant on DOM manipulation.
- Easier to test: Reactive Forms are easier to test than template-driven forms, as all the logic and validation is handled in the data model.
- Easier to debug: Reactive Forms are easier to debug than template-driven forms, as all the logic and validation is handled in the data model.
Overall, Reactive Forms provide a powerful way to build forms in Angular, and are more maintainable, reliable, and easier to debug than template-driven forms.
Creating Reactive Forms
Creating Reactive Forms in Angular is easy. First, you need to import the ReactiveFormsModule from the @angular/forms package. Then, you need to create a FormControl, FormGroup, or FormArray. FormControls are used to represent individual controls such as text input fields, checkboxes, radio buttons, etc. FormGroups are used to group related FormControls together, and FormArrays are used to represent collections of FormControls.
Once you’ve created the FormControl, FormGroup, or FormArray, you need to bind it to the template. This can be done using the formControlName, formGroupName, and formArrayName directives. These directives allow you to bind the form values to the template.
FormControl and FormGroup
In Reactive Forms, FormControls and FormGroups are crucial elements. Specifically, FormControls represent individual controls, such as text inputs, checkboxes, and radio buttons. They are instantiated by invoking the FormControl() constructor and can be bound to the template via the formControlName directive. On the other hand, FormGroups group related FormControls together. They are created by calling the FormGroup() constructor, and can be associated with the template using the formGroupName directive. Moreover, FormGroups allow for the implementation of custom form validations, a key benefit of using Reactive Forms.
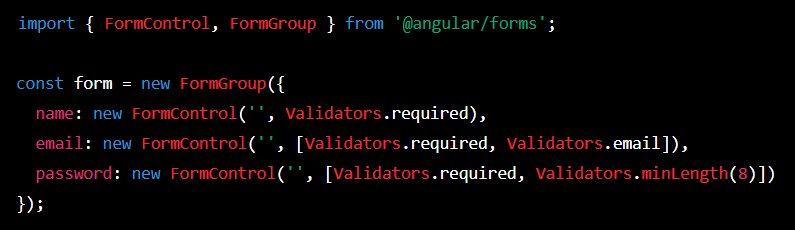
form is a FormGroup that contains three FormControls: name, email, and password, each with specific validations.Validating Reactive Forms
Validation of Reactive Forms is a straightforward process. One common method of validation is the utilization of the Validators class, which provides several built-in validation functions such as ‘required’, ’email’, ‘minLength’, ‘maxLength’, ‘pattern’, and others. To utilize the Validators class, you must import it from the @angular/forms package. Then, create an array of Validators containing the desired validation functions and pass it to the FormControl, FormGroup, or FormArray during initialization. Once the validators are applied, you can employ the hasError() and getError() methods to check for errors and retrieve error messages. Additionally, the markAsDirty() and markAsPending() methods can be used to mark the form as dirty or pending.

nameControl is a FormControl that requires a minimum length of 2 characters and is required.Submitting Forms
The most common method for form submission is utilizing the submit() method, which takes a callback function as an argument. This function is executed upon form submission and can be utilized to perform any desired action, such as sending data to a server. In addition to the submit() method, you can also trigger form submission by using the onSubmit() method, which also takes a callback function as an argument. This function is invoked upon form submission and can be utilized to perform any desired action, such as sending data to a server.
import { Component, OnInit } from '@angular/core';
import { FormControl, FormGroup, Validators } from '@angular/forms';

@Component({
  selector: 'app-example-form',
  template: `
    <form [formGroup]="form" (ngSubmit)="onSubmit()">
        <div formGroupName="user">
          <label>Name:</label>
          <input type="text" formControlName="name" [ngClass]="{ 'is-invalid': nameControl.invalid && nameControl.touched }" >
          <div *ngIf="nameControl.invalid && nameControl.touched" class="invalid-feedback">
            <div *ngIf="nameControl.errors.required">Name is required</div>
            <div *ngIf="nameControl.errors.minlength">Name must be at least 2 characters</div>
          </div>
          <label>Email:</label>
          <input type="email" formControlName="email" [ngClass]="{ 'is-invalid': emailControl.invalid && emailControl.touched }" >
          <div *ngIf="emailControl.invalid && emailControl.touched" class="invalid-feedback">
            <div *ngIf="emailControl.errors.required">Email is required</div>
            <div *ngIf="emailControl.errors.email">Invalid email</div>
          </div>
        </div>
        <div formGroupName="password">
          <label>Password:</label>
          <input type="password" formControlName="password" [ngClass]="{ 'is-invalid': passwordControl.invalid && passwordControl.touched }" >
          <div *ngIf="passwordControl.invalid && passwordControl.touched" class="invalid-feedback">
            <div *ngIf="passwordControl.errors.required">Password is required</div>
            <div *ngIf="passwordControl.errors.minlength">Password must be at least 8 characters</div>
          </div>
          <label>Confirm Password:</label>
          <input type="password" formControlName="confirmPassword" [ngClass]="{ 'is-invalid': confirmPasswordControl.invalid && confirmPasswordControl.touched }" >
          <div *ngIf="confirmPasswordControl.invalid && confirmPasswordControl.touched" class="invalid-feedback">
            <div *ngIf="confirmPasswordControl.errors?.required">Confirm Password is required</div>
            <div *ngIf="confirmPasswordControl.errors?.passwordMismatch">Password does not match</div>
          </div>
        </div>
        <button [disabled]="form.invalid">Submit</button>
    </form>
  `
})
export class ExampleFormComponent implements OnInit {
  form: FormGroup;

  ngOnInit() {
    this.form = new FormGroup({
      user: new FormGroup({
        name: new FormControl('', [Validators.required, Validators.minLength(2)]),
        email: new
Working with Form Arrays
Form Arrays are used to represent collections of FormControls. They are created using the new FormArray() constructor, and can be bound to the template using the formArrayName directive. Form Arrays can be used to add and remove FormControls dynamically.
To add a FormControl to a FormArray, you need to use the push() method. This method takes a FormControl as an argument, and adds it to the FormArray. You can also use the insert() method to insert a FormControl at a specific index.
To remove a FormControl from a FormArray, you need to use the removeAt() method. This method takes an index as an argument, and removes the FormControl at that index.
Working with Form Builder
Form Builder is an Angular helper class that makes it easier to create Reactive Forms. It provides a number of methods to create FormControls, FormGroups, and FormArrays.
To use the Form Builder, you need to import it from the @angular/forms package. You then need to create an instance of the Form Builder using the new FormBuilder() constructor. This instance can then be used to create FormControls, FormGroups, and FormArrays.
The Form Builder also provides a number of methods to add and remove FormControls from FormArrays. These methods include addFormControl(), addFormGroup(), addFormArray(), and removeFormControl().
Dynamically Adding and Removing Form Controls
It is possible to dynamically add and remove FormControls from FormArrays. This is useful when you need to create a dynamic form, where the number of FormControls can change.
To add a FormControl to a FormArray, you need to use the push() method. This method takes a FormControl as an argument, and adds it to the FormArray. You can also use the insert() method to insert a FormControl at a specific index.
To remove a FormControl from a FormArray, you need to use the removeAt() method. This method takes an index as an argument, and removes the FormControl at that index.
Reactive Forms and Services
Reactive Forms can be used in conjunction with services to create powerful and dynamic forms. Services are a great way to encapsulate logic and make it reusable. They can be used to fetch data from the server, handle form submissions, and more.
When using Reactive Forms and services together, it is important to make sure that the service is initialized before the form is created. This can be done by using the ngOnInit() lifecycle hook. The ngOnInit() hook is called when the component is initialized, and can be used to initialize the service before the form is created.
Conclusion
Reactive Forms are a powerful way to build forms in Angular. They provide a number of advantages over template-driven forms, including better maintainability, better performance, and easier testing. This guide has walked you through the process of mastering Reactive Forms in Angular. We’ve covered the basics of creating reactive forms, validating them, submitting them, and working with FormArrays and FormBuilder.
Now that you’ve mastered Reactive Forms in Angular, you can start using them to build powerful and dynamic forms. Reactive Forms are a great way to add custom validations, handle form submissions, and more. So what are you waiting for? Get started with Reactive Forms in Angular today!